1.26.2012
Smooches & Hugs! (With a little crackle)
Well first off this project lead to a debate between the husband and I on which were the hugs and which
were the kisses...so in case you need that clarified, check this out, which is way too much clarification for anyone! Though I was right, but not with 100% confidence, the husband made a great argument as to why he thought X's were hugs and O's were kisses.
So with lots of crafty love, hugs & kisses, heres a quick easy way to spread some vintage inspired LOVE this valentines day season! And you can use this for any other words or holidays too!
Vintage/Crackled Letters
Supplies:
- Letters of choice
- 2 colors of paint (one for the base color that will crack through and one for the top color)
*The top color will be the predominant color, for this project I alternated the top and base coat with the
X's and O's for contrast.
- Elmers Glue
- Sponge brush
- 1" paint brush
- push pins
Directions:
1. Add push pins to the back of the letters so that they act as a base to hold the letter up off your work surface, this will help so that your letters are not painted to the work surface and so the sides can be throughly covered.
2. Paint the letters the desired base color and allow to throughly dry.
3. Add a layers glue to the front surface of the letters evenly with a sponge brush, once one letter is thoroughly coated add the top coat and then move on to the next letter. You do not want the glue to dry before you add the top coat of paint or it will not properly crackle to give an aged look. You can experiment with the amount of glue you but on the letter to get more or less of a crackle affect.
Allow to throughly dry, take out the push pins and display! Happy Valentines Day!
XOXO
1.25.2012
Bullseye!
Love Arrows:
A super easy and cheap project you can even get the kids in on
Supplies: (to make 6 arrows)
- 3 dowel rods (pencil thickness)
- pink, red, black, white, silver paint
- pink, red, light pink felt
- a thin & thick paintbrush
- hot glue gun
- scissors
- utility knife or hand saw
- pencil sharpener
Directions:
1. Cut the dowel rods in half so you get 6 arrows out of the 3 dowel rods. I first marked the center point and then scored it with a utility knife. Score around the entire dowel rod a few times til it is easy to break in half. (you can use a hand saw if you have that available)
1. Cut the dowel rods in half so you get 6 arrows out of the 3 dowel rods. I first marked the center point and then scored it with a utility knife. Score around the entire dowel rod a few times til it is easy to break in half. (you can use a hand saw if you have that available)
2. sharpen the cut ends of the dowel with a pencil sharpener. It is recommended to not sharpen to a point for safety reasons. (no one needs a sharp Love Arrow plummeting towards them)
3. Paint the arrows in shades of pink and red & paint the tip metallic silver (set aside to dry).
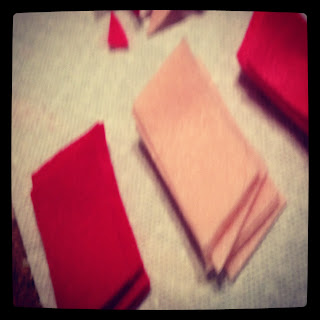
4. While the arrows are drying cut out 1x9" strips of felt. Cut the 9" strips into three 3" strips. Then cut the ends of the felt on a diagonal (as pictured) to create the "feathers" for the tail of the arrow.
5. Glue the felt pieces to the dowel, with the felt end pointing towards the end of the arrow dowel (as pictured). Embellish using a detail brush and contrasting paint colors, Add stripes to the arrow base and feathers. Notches can also be cut into the feathers to add interest.
Now all you need to do is add them to a vase & enjoy
Share the Love - Pass it on. Here are some coupons for your local craft store!
(this blog is not sponsored by either of the stores listed above, just trying to help fellow crafters save a buck or two!)
Labels:
arrows,
craft,
create,
diy,
feb 14,
hobby lobby,
joann,
love,
pink,
red,
valentines day,
white
Subscribe to:
Comments (Atom)


